The name comes from our Neolithic ancestors, and suggests a simple diet without all the crazy complicated things that we’ve done to food over the last couple of hundred years.
However, it does sometimes leave you without some of the basics that you’ve gotten used to, or trying to find alternatives that fit within the restrictions of the diet.
Luckily, we have you covered. If you’re looking for a paleo-friendly alternative to bread (see also “Gluten Free And Paleo Rosemary Cassava Bread“), or are just looking to go grain or dairy free, then look no further than this recipe for tigernut Bread.
Contrary to the name, this bread is nut free, as well as being grain free and dairy free. tigernut flour bread is soft and moist, but it holds together well enough for sandwiches and toast alike, and is great with both sweet and savory toppings.
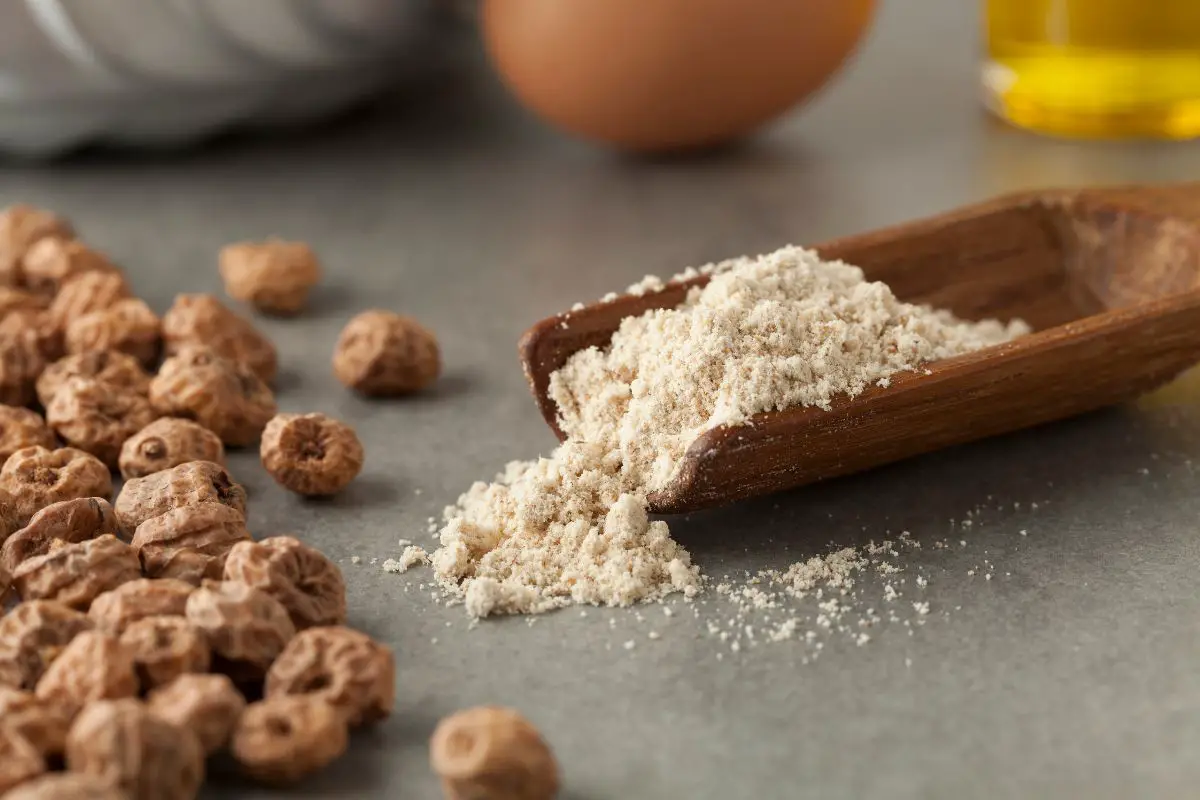
Tigernuts?
Don’t worry if you’ve never heard of tigernuts before, you’re not the only one.
Though they’re not particularly common, and you might have to go to a specialist store to find this flour, I promise that it’s totally worth the extra leg work.
Though the name might trip you up, tigernuts aren’t actually nuts. Instead, they are a small root vegetable grown in warm climates, typically in the Eastern Hemisphere.
You can find them in South Europe, Madagascar, and some places in India.
This root is naturally sweet, with a subtle nutty flavor, making it perfect for baking. It functions similarly to almond flour, as both have a very fine texture and provide a sweet flavor to whatever you’re baking.
Personally, I really like tigernut flour because it means that you can make an allergy-friendly meal whilst still sticking to a paleo diet (see also “Paleo On The Go Reviews“).
It’s very easy to rely a lot on nuts when going paleo or grain free, so this is a great way to still consume this protein and make tasty bakes and remain paleo.
Other alternatives can be cassava flour or plantain flour – these are both paleo and nut free.
What’s Included?
This tigernut flour bread uses less than 10 ingredients, making it pretty simple as far as bread alternatives go. For this recipe, you’ll need the following ingredients:
4 Large Eggs
½ cup of Water
¼ cup Olive or Avocado Oil
1 tsp Apple Cider Vinegar
2 cups Tigernut Flour
¼ cup Tapioca or Arrowroot Flour
¾ tsp Baking Soda
¼ Salt
What Else Will You Need?
Once you’ve gathered your ingredients, you’ll also need two large bowls, an 8”x4” loaf pan, a whisk, and a wire cooling rack.
As well as this equipment, you’ll also need about an hour to make this recipe – 10 minutes to prepare it all and 45 minutes to bake it.
Toppings for this bread could include peanut butter, a fried egg, or if you want to, you could even turn it into French toast. Whatever your preference is, you’ll be able to do it with this bread.
Instructions
First of all, you need to preheat your oven to 350 degrees F. Whilst that’s heating up, line your baking pan with parchment paper – you want to make sure that you’ve covered the bottom and the sides.
I recommend leaving flaps at either end of your baking pan, to ease the process of getting your bread back out of the pan.
Once your pan is prepped, you can start to combine your ingredients.
To begin with, add all of your wet ingredients to a bowl. This will include your eggs, water, oil, and vinegar. Mix that all up together with a whisk until there are no lumps and everything is smooth.
In a separate mixing bowl, add your dry ingredients. These are your different flours, salt and baking soda. Again, mix these together a little, though you don’t have to be as thorough as you do with the wet ingredients.
Once you have both combinations of ingredients, you can start to mix them together. Add your dry ingredients to the wet bowl, little by little, whisking as you go. Keep mixing until everything is smooth again.
Now you have a finished batter! This can get poured into your baking pan, and smoothed over until you’re happy with how it looks. Next, place your bread in the oven and bake for 45 minutes.
After this time, check that it’s cooked all the way though, and if it is, remove it from the oven and let it cool for about 10 minutes before transferring it onto a wire cooling rack until it’s room temperature.
You’ll end up with a deliciously soft, subtly sweet bread that is versatile to be used just like regular bread.
Storage
Once your bread is made, you’ll want to keep it in the fridge. You can slice it up and then keep it in an airtight container in the fridge for about a week before it goes bad.
You’ll be able to grab it out whenever you want a snack or a sandwich, making it just as convenient as regular bread, but with half the energy it takes to make it.
You technically can store this bread in the freezer, where it’ll keep for a month. However, just like regular bread, it definitely loses some of its texture and flavor in the freezer, so it’s a lot better in the fridge.
What To Eat With Tigernut Bread
As mentioned before, you can do a lot with tigernut bread because of how versatile it is. For breakfast, you can toast it and top with butter and jam, or a mashed avocado.
For lunch, it can be a sandwich, or pair it with some soup and make a grilled cheese.
Final Thoughts
This bread is great for anyone on a paleo, grain-free, or dairy-free diet, give it a try!
Hi, my name is Justin Roberts and I like to live by one major rule in life – health is wealth. And where does all health stem from? The food choices we make.
I grew up in a not-so-wealthy household that often struggled to get food on the table.
The food we did eat was cheap, holding no nutritional value at all. I’m talking frozen foods, carbs, fats, and very little fresh produce.
I am fortunate enough to have made a life for myself where the money for food is no longer an issue, and I have spent the majority of it looking into healthy foods and different diets to try.
The most notable is keto and paleo. I am also interested in only using whole foods wherever possible – call it trauma!
As a professional chef, I now create recipes surrounding these diets every day. My family are my tasters, and I strive to make my recipes as budget-friendly as possible.
I hope that you’ll find some inspiration for healthier meals from my website. I want to create a catalog of recipes that you can come back to time and time again. Enjoy!